Blog

Fostering Dogs 101

Chris and I got into fostering dogs after Chris’ coworker had shared her experiences with him. Alaina had always been interested in the idea, and had convinced him years earlier to foster cats. Once they reached full cat capacity (two), and partial dog capacity (one of two), Chris was open to the idea of one more canine in the house. Knowing someone that actively fostered dogs helped him understand the undertaking and also gave us some security, since we had a first-hand resource to help.

We started with the rescue that our resident dog, Juniper, came to us from. American Black and Tan Coonhound Rescue (ABTCR) has a mission to rescue coonhounds and bloodhounds all across the United States. Juniper came to us from Alabama, for example, and we were set to foster in Pennsylvania. We filled out a form, had a phone interview, sent pictures of our home, and were eventually approved! First step done. We also ended up reaching out to a local(ish) rescue, Northeast Coonhound Rescue (NECR), whose mission is to rescue coonhounds and beagles into the Northeast United States. Both organizations required forms (personal information, experience, references) and interviews as part of the approval process.

We had our first foster through ABTCR, in March of 2019. You can check out all the fosters that have passed through our home at our website page, Coonhounds.

Instead of walking through each individual foster experience, I want to outline things that don’t change from foster to foster.


Introductions

We have two resident cats and one resident dog at HnH. It is important that the safety of our resident pets is not compromised by our foster dog. We cover this by requesting the foster is ‘cat tested’ and ‘dog tested’ in a safe, supervised environment wherever they come to us from (shelters or a volunteer’s home). We also don’t set them up for failure.

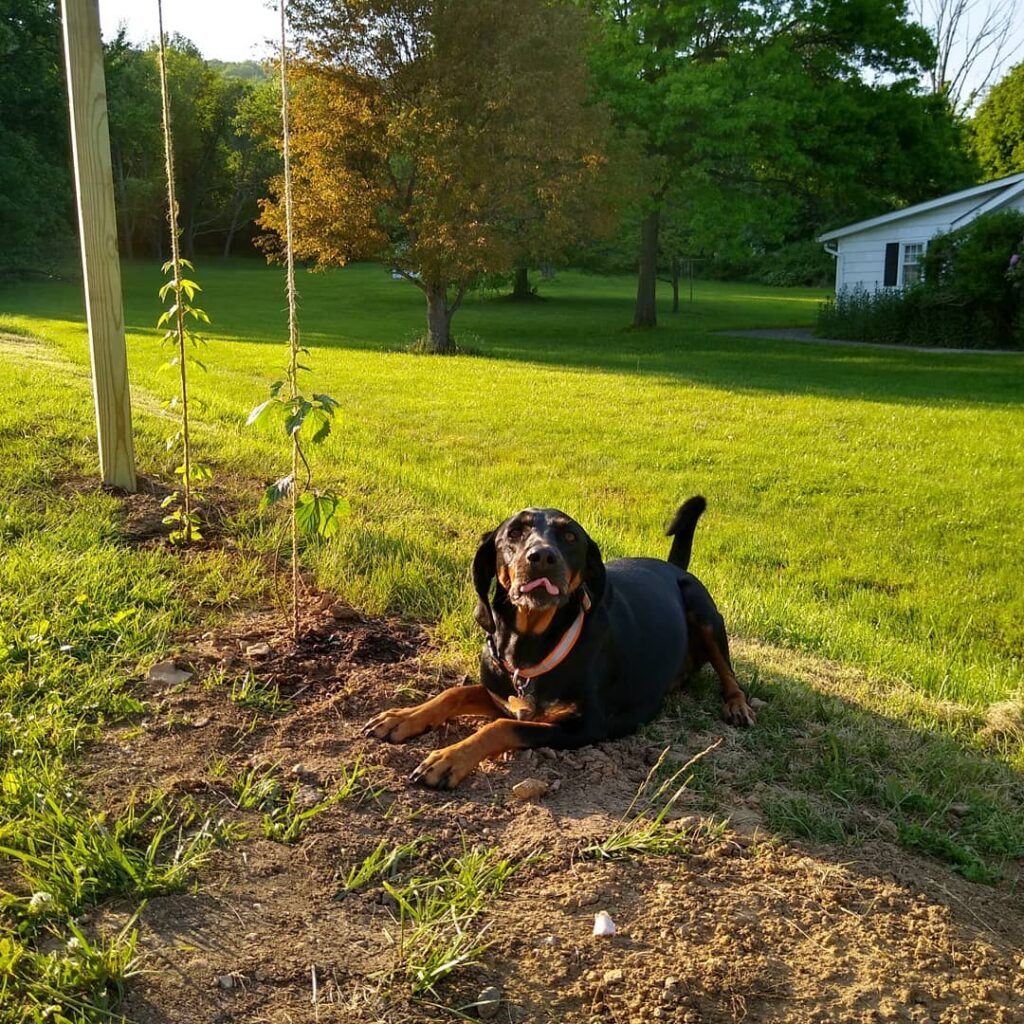
Introductions to the resident dog happen through a gate or fence. The foster is on a leash outside the fence, then we let Juniper out in our backyard. They may interact through the fence, safely separated. We also let the foster dog explore the yard on their own. On the leash we take them around the backyard and let them sniff all the sniffs, get to know the scents of the animals here. Thankfully, with much experience, we know Juniper is safe around new dogs. We let Juniper out into the yard, assuming all has gone well, and they meet, foster dog still on the leash. 100% of the time, the foster has been enthusiastic about wanting to play and eager to run around with Juniper. We’ll let the foster off leash and let the dogs run around together. Juniper is a rock star, in that while she tolerates bad manners, she corrects them. She is not aggressive when manners or her wishes are violated, but she enforces her boundaries. She teaches the fosters dog manners and good play practices.

Introductions with the cats happen similarly inside the home. Resident animals are removed, and the foster is allowed to get to know the space and the smells. We put up a gate with a cat-door in it, that allows the cats to have several rooms to themselves. This allows them access to safety and alone time, as needed. Their litter is always only accessible to them, not the foster. The foster dog will spend the first few days being leashed while inside so they can get to know the cats and we can work with them on potty training. One cat is very people shy, but pays dogs no mind. They can smell her, and she may hiss, but generally doesn’t run away or further react. Our other cat is the king of the house, and knows it! He will not like the intruder at first, so it’s slow introductions, removing the dog fairly quickly from his bubble, and ensuring the foster dog exists in the home, but not in the cat’s space. As the resident cat warms up, there’s constant supervision. The foster dog is never left unattended, which is where the dog room (next section) comes in useful. With each foster, we have reached a balance among the resident pets, even the King Cat. Not everyone is thrilled, but everyone can coexist.

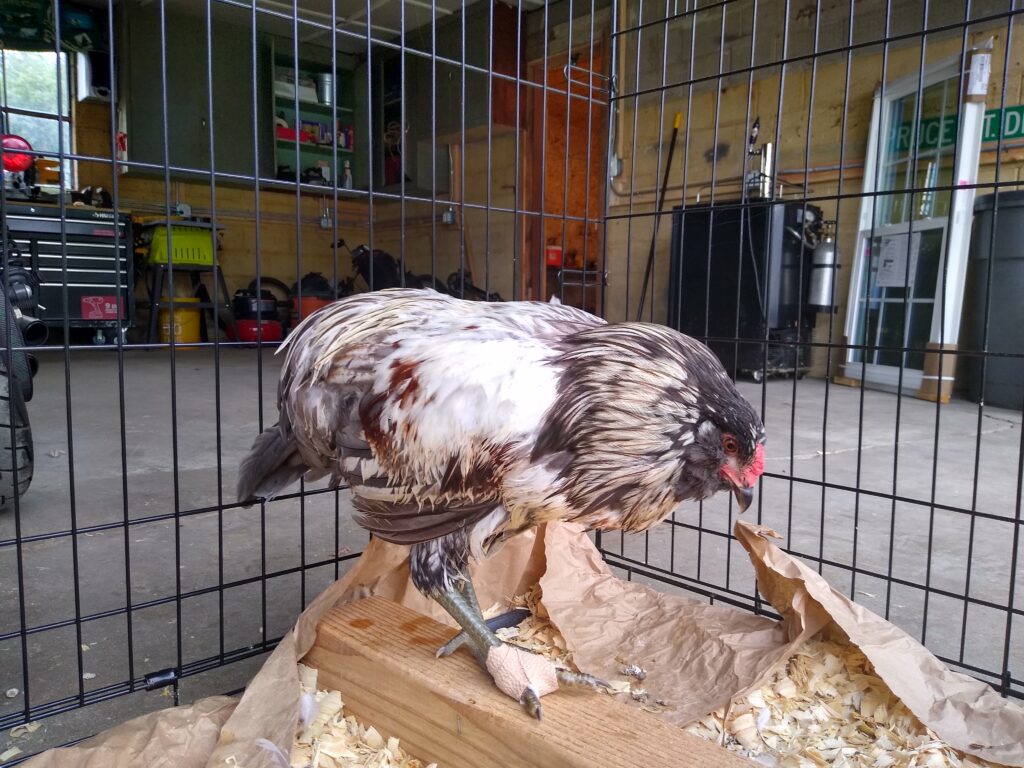
Note: We do have a flock of chickens, and foster dogs are never given access to the chickens.

The Dog Room

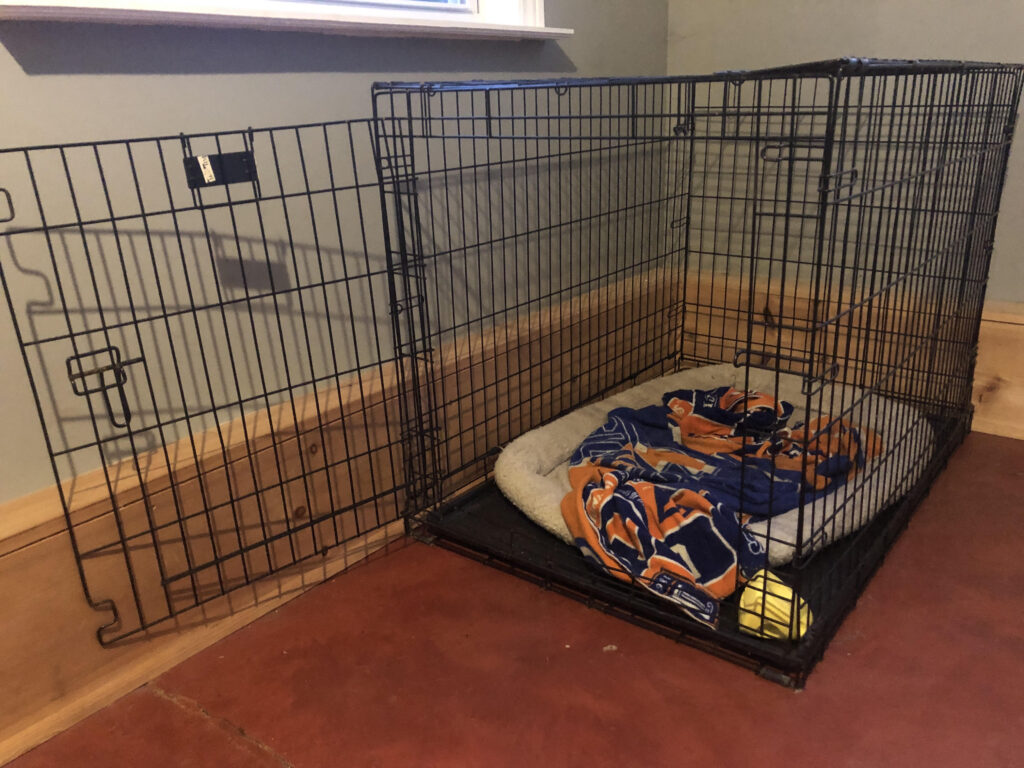
In our first house and in our current home, we provided a room for the foster dog. The room included a dog crate, dog bed, blanket, food and water dishes, and dog toys. In our first home, it was also our office space so there was an old desk, desk chair, and filing cabinet also in the room. In the current house, this space is the mud/laundry room so there it a washing machine, dryer, and trash can (with lid) in the space. The office space had a full door, and the mud room came with a half-door already. The expectation of this room was low. The floors must easily be cleaned, anything in the room is not of high value/can be replaced (including the window treatments and molding), and the room must be safe for the dog. It is important to have a “dog-proof” place the dog may be left alone. This place serves many purposes. If you need to leave the house, the dog may stay here. If there’s a contentious relationship between the resident pets, the dog may stay here (“crate and rotate” type scenario). The dog should come to view this place as safe, so as they emotionally need a ‘home base’ they have one.

The Crate

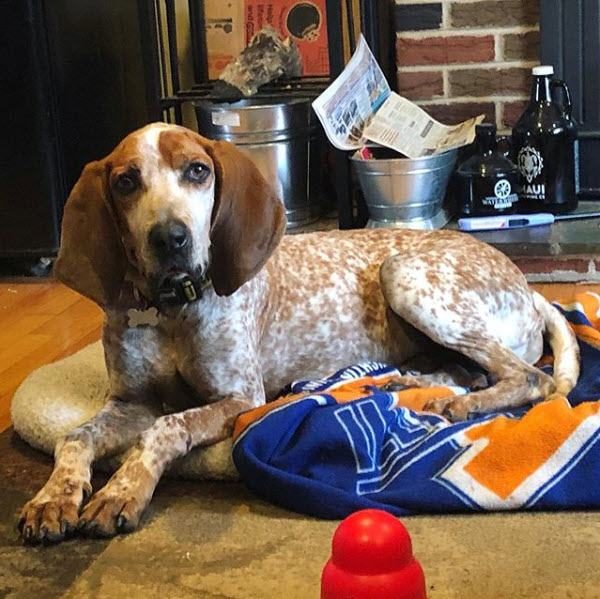
I won’t go completely into crate training, but you may assuredly find many great resources for insight into crate training (libraries, internet, etc.) and the benefits. Our foster dogs sleep in their crate, and are not crated during the day. We also believe crating at night helps with potty training. The right size crate will be humane, allowing them to stand and turn around, but also discourage elimination in the space. The crate is not used as a punishment. We feed them breakfast and dinner in the crate, to associate rewards with the crate. That is the fastest way we have found to get fosters into the crate: food/treats. With our most recent foster, toys were the key (throw a toy or two in there and he’d run in after them). We use the same command when they enter the crate for bedtime “go home.” Ultimately, we want to set the dog up for success, and being crate trained adds to their resume.

Behavior

After the dog becomes accustomed to their room and routine, we start working on training. “Sit” has generally been easily mastered. “Down” is a fairly easy progression. We have also successfully trained a wait, with release word “okay” several times. We do this by starting with their meals. Instead of food waiting for them in the crate, we graduate to asking them to be in their crate, then delivering the food. We want to communicate you need to be in your crate, then you are provided the meal, still in the crate. We graduate this to be in the crate, and stay there until I set the food down, outside the crate. This is reinforced by simply repeating the steps. If the dog leaves the crate before the food is down, we make an “ah, ah” clear verbal communication, and pick the food up. Ask them to come back to the crate, and repeat. Obviously this isn’t nailed on the first try, but it’s important to acknowledge success immediately. Use a success/release word, which will help in future steps. We like “okay!” Right when the food hits the floor, when they are still in their crate, they get an “okay!” Keep eye contact, and be consistent in the expectation of this step. We have found all fosters have been quick to understand this. The last step is the wait. It is similar in reinforcement, where we use the verbal “ah, ah” for not yet and withhold “okay” until the release. Now the word is the trigger alone. We set the food down on the floor, outside the crate, and expect the dog to wait for the “okay” to leave the crate and eat. Teaching them patience goes so far in other behaviors and training. With hounds generally being incredibly food motivated, this training regimen has been very effective.

Outside of commands, other behaviors we reinforce are no foster dogs on the furniture. Again, this makes their resume longer, as they may go to a family that practices that. We use positive reinforcement training, so the best practice is to reward good behavior with treats or attention. Bad behavior is addressed with stern verbal communication “no” and redirection (treats, toys, attention). Our current foster, as I write this, seems to have learned his name, so he has been easy to redirect by calling him and lavishing him with attention as his reward. This is how chewing or handling non-dog items are handled. It’s important, again, to set them up for success and limit access to items they shouldn’t have. We take responsibility for adapting our space, which might mean moving a shoe rack, making sure shelving is higher off the ground, or enforcing a boundary on our bedroom.

Potty training has worked the same with all the fosters. We elect to foster older dogs more often than not, which we know are physically capable of holding their bladders for longer. It’s just down to communicating where they may eliminate (outside) and where they may not (inside). We do not utilize puppy pads. As mentioned above, we keep a leash on them while potty training, or what we graduate to is a harness with a short handle for easy grabbing. When not in the dog room they are supervised. If they start to eliminate, we catch them in the act and startle them with a loud noise “hey hey hey,” “AYYYY,” or “ARGHS,” whatever works, the idea is to surprise them a bit, so they may stop eliminating. Then you act fast! grab the handle and get them outside!! Walk around with them until they finish eliminating, and reward. Amazing! Treats! Positive reinforcement. Being proactive helps as well: supervise their outdoor time and put a name to the behavior (we choose “go potty”) and reward when that naturally occurs outside. Also noteworthy, is that if the foster dog eliminates in their room, when unattended, we do not address it with them. The mess is cleaned, and that’s that. We reinforce behavior in the act, good or bad, not after the fact. Similar to training at meal times, we have found our fosters have been potty trained fairly quickly, then we no longer need the harness inside.

We also like to reinforce their names by giving them and Juniper treats while verbalizing their name. “Juniper” as I hand Juniper a treat avoiding the foster, “NAME” when handing the foster their treat. Juniper is always close by, and can also model the requested behavior (“sit,” “down,” etc.).

Other Notes

We ask many questions before the fosters come to stay with us, including about cat/dog friendliness, as mentioned earlier. We also ask where they are from, the condition they are in, how they came to the rescue, how their handlers observe their behavior to be. We have yet to turn down a dog due to the answers (we have had varying cat-test answers), but we like having the context. We also get all their vet records with them, when they arrive.

We feed the dogs the same food as our resident dog gets, and at the same time, though separately in the dog room. Juniper eats in the kitchen, the dog room comes in handy to avoid food aggression, and let the slower eater take their time without intrusion. Food, treats, and toys are all expenses we manage as part of the fostering process.

Sometimes we see the vet, as needed, with fosters, in which case we take them to the same vet we use. We communicate with the rescue because the rescues we work with cover medical expenses. We also communicate with the rescues regarding preventative medicine, as they send that along as well, so the fosters are given what we receive.

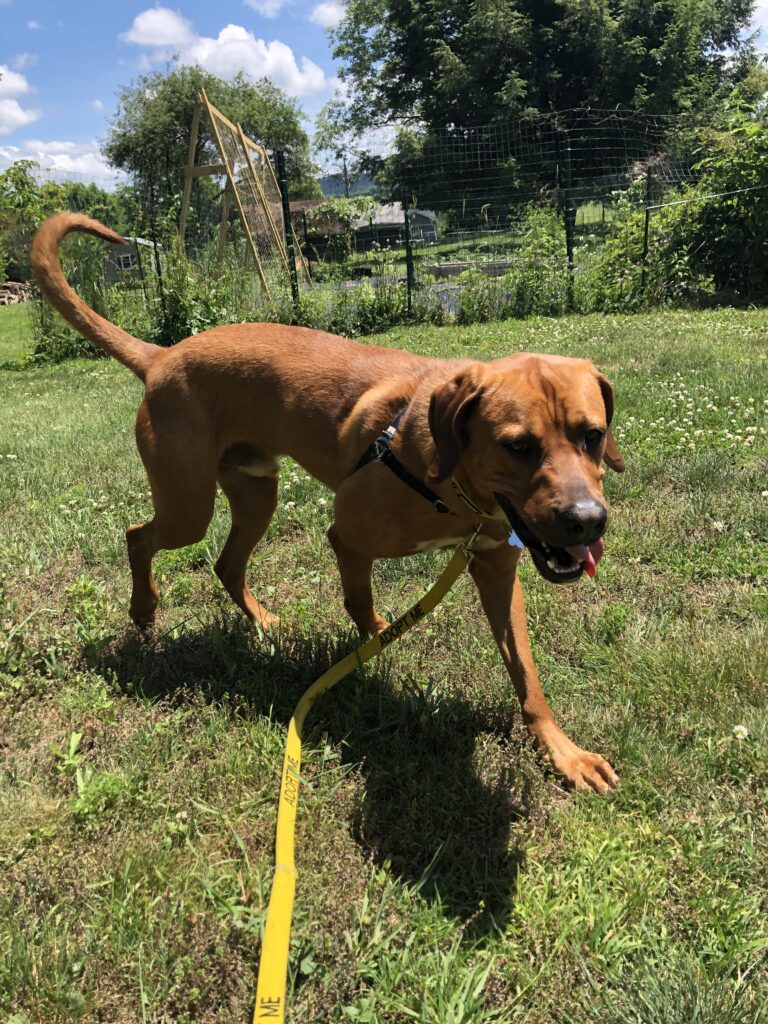
We also got an “ADOPT ME” collar and leash set from Amazon, that we put a tag on with our information. Every foster we have had has used it, and it really helps attract attention when we take the dogs out. We also carry rescue business cards, so we can put the dog’s name on the back and pass them out to potential adopters. This hasn’t worked yet, but has led us to meeting many interesting people, and socializing the rescues!

Expectations

The last bit I’ll touch on is that while fostering a dog, your day-to-day will not be the same as when you are not fostering a dog. I wake up earlier, knowing the morning routine with a foster takes longer. Sometimes our fosters whine at night, until they adjust to their routine. Supervising them requires constant vigilance, which is not my normal state of existing in my home. Everyone asks “how can you let them leave?” and sometimes the answer is as simple as so I can have my life back.

Our resident dog is six, and has been with us for almost five years. We can walk with her off-leash, we can let her be out with our chickens, and she sleeps an awful lot. She doesn’t lick or counter surf, or chew things she shouldn’t. This makes for a very easy life with her, where I really never have to be on my guard. Starting with a new dog from scratch requires work. Many of the dogs that we have fostered have challenged us, with separation anxiety being the hardest to manage. All of the dogs have changed our day-to-day lives. And all of the dogs have loved us unconditionally, too.

Fostering Dogs 101 Summary

Plan introductions to resident pets

Set up a safe space for the foster

Reinforce behavior expectations

Work on light training

Manage your expectations

I hope this has provided some insight into the experience of fostering dogs!! We believe it is all worth it, and all the above has worked for us many times. If you have any questions, please comment below or email us at [email protected]. We would love to support anyone else considering fostering, as rescuing animals is a strong value of ours.

Cheers and Howls,

Alaina

Chicken Medic

While this post does not have graphic images, it does describe (in detail) chicken ailments. The end of the article includes recommendations for a Chicken First Aid Kit.

Symptoms

If you’re like me, your pet’s health is something covered by your trusted veterinarian. Your dog can’t keep food down, or wakes you up with a swollen eye, and you ring up your vet and see when you can head in. With chickens, it’s hard to find a vet that will agree to see them. What I’m looking for is an “exotic” animal vet, and they’re not at every clinic! Thankfully, a clinic close to us has one of these specialized vets, but that means her time is hard to get.

Two weeks ago, Lil Roo didn’t move when Chris came to the chicken coop. Unusual. So we picked him up and brought him to the house for medical isolation. Maybe he had a sprained ankle. Maybe he had bumblefoot. Either way, he needs special attention, and time away from the flock. Chickens can be vicious, as we’ve learned. If they can see blood, they will fixate and further an injury on another bird, including when they made the initial injury.

We set up a dog crate for Lil Roo, that has pine shavings, water, and food, and a short 4×4 as a perch. This has been his private HnH hospital room since we first saw something was off. His foot progressed from limping to swollen and ugly.

Lil Roo all bandaged up in his HnH private medical ward

Diagnosis

Generally, superficial foot ailments in chickens is called “bumblefoot”, which is a staph infection that’s taken hold in the foot. Plenty to google there, enjoy! Usually there is a focus point of the infection, that looks like a scab or cancerous mole. Worst case, you can cut it out, and pull the infected fibrous foot material with it. For us, Lil Roo’s foot did not present with an obvious infection point, just lots of swelling through his toes and foot pad. Poor boy! So what is this thing? Who knows. Staph infection starts when a chicken gets a cut on their foot, jumping off a high roost or getting a scratch from walking on rocks, and the cut gets infected which travels around the foot. It can be deadly, but is fairly easy to catch. There’s lots of internet advice on how to treat – mainly pull that spot/bad tissue out then heal that wound – but not a lot on just swelling.

Treatment

After over a week of swelling I called the vet for availability, no dice for another week where I could try to sneak into her emergency hours. But her emergency hours weren’t taking place for another few days! So Chris recommended we move forward, and lance the largest blister. So we cut into his foot between his right and center toe, and let fluid leave the incision. From there, we did a 10 minute Epsom salt soak, put Neosporin* (without pain relief!!) on the gauze and wrapped his foot up. Rinse and repeat every day. We didn’t end up getting in the vet’s schedule, but his foot really turned around! **The ingredient(s) to add pain relief to Neosporin is toxic to chickens.

Some skin on his foot flaked off, but overall the swelling is much reduced, One toe now looks completely normal again. The middle and right toes look to be healing from the pad out. So right now, right around his toenails look abnormal, but at least not very swollen. There’s a little red, some skin still flaking, and it doesn’t smell great. Recently I switched to a salve on the gauze, called Prid. Also of note, with sick chickens, we feed them a scrambled egg (1 min in the microwave) every day. This gives them great nutrients to help their bodies heal. Putting electrolytes in their water also helps!

Photo by 322 West Photography

Chicken Ailments

As described earlier, Chicken Tenders (people that keep chickens) are usually left up to their own devices to treat chicken/poultry medical afflictions. Here at HnH, we have experience with at-home remedies succeeding and failing. We had a Speckled Sussex slow down, puff up, and drastically change her behavior a couple years ago. With Chicken ailments, you don’t know something is wrong until it’s very wrong. Their instincts are to shield any vulnerability for survival’s sake.

With Pippin (our head-hen-in-charge Speckled Sussex), we did the crate medical isolation, gave her egg, electrolytes, and time. We likely wormed her in case, but she actually turned around fast. Those circumstances can feel touch and go, and VERY anxiety-inducing. Since the chicken is already in the trenches by the time you come in to treat them, you don’t know if you got there too late. You also don’t know WHAT is going on. If there’s nothing external to clue you in, there could be a multitude of internal problems. Sour crop, egg bound, an egg broke inside, worms..

I strongly recommend Chicken Tenders familiarize themselves with online resources (mybackyardchicken.com, a local facebook group, even a national facebook group) and get some chicken literature. I have several books that helped me prepare my chicken first aid kit, and discuss in detail common chicken ailments and (at-home) treatments. To get started I recommend The Chicken Chick’s Guide to Backyard Chickens and A Chicken in Every Yard.

Chicken First Aid Kit

I recommend every Chicken Tender have these things on hand:

  • Vetwrap
  • Gauze
  • mL syringes
  • Disposable gloves
  • Vaseline
  • Neosporin (no pain relief ingredients)
  • Smile’s PRID drawing salve
  • De-wormer (Wazine or Safe-Guard)
  • Water-soluble vitamins and electrolytes
  • VetRx
  • Nutri-drench
  • Corrid
  • Chicken -safe cleaning solution (we have Chlorhexidine Solution)
  • Blu-Kote or Vetericyn Plus
  • Epsom Salt
Good Luck!

This will set you up for success so you’re not running to a Feed Store looking for one of these last minute. Also, getting a feel for your available resources proactively will, again, save you from scrambling last minute. We wouldn’t be successful without our hodge-podge of chicken communities and their advice.

Propagation Using Clippings

The two ways that we have learned to expand the amount of hop plants we have is to either: harvest rhizomes or propagation. In order to harvest rhizomes you will need a plant with an established root system ~2-3 years old. Because Hops ‘n’ Hounds Farm is just starting out, we don’t have the ability to harvest rhizomes until future seasons and instead have been beginning to propagate to expand from our existing plants using clippings.

Note: Establishing new plants from clippings is effective but only expect an annual return of ~80% of the plants.

Finding an Opportunity for a Clipping

The main goal is to have a strong “Main Bine” for your individual plants. While you watch your hop plants take off to the skies on the trellises you have built (hopefully with some help from the previous blog), you may begin to see small additional bines begin to grow off of your main bine. By having one strong main bine, all the nutrients from the established root system will be more focused. Additional bines also require nutrients and as they grow longer, thicker, and with more leaves, they begin take away from the available nutrients for your main bine and, in turn, stunt its growth.

So you can either crop these additional bines and discard or use them to grow your “fleet”! When these additional bines begin to show up, that is your opportunity to prepare for propagation. From my recent experience and helpful insight from our fellow brew partners that gifted us our first plants, we allow the additional bine(s) to grow ~6” or greater. While that growth is stunting the growth of my main bine, it allows the offshoot to get big enough to clip and start propagating. Because we’re growing our hop garden, the trade off is worth it.

New bine beginning to start
Bine ready to be clipped for propagation

Once the offshoot bine(s) reach ~6 inches, we snip them off near the split from the main bine, but not directly at the split. It is also highly suggested to snip off some leaves from the clipped bine being used for propagation. Similar to the main bine practice, this focuses the nutrients to establish new roots and grow the plant. So leave a couple leaves to collect sun, but not so many as to take too many nutrients from the main bine.

Allowing New Roots to Form

Now that you have your clipping(s), you simply need to store the clipped end in water and place them in an area of your home with maximum amount of sun exposure. We do this by placing the clipping(s) in mason jars full of water and either place them on the window shelf or hang them by the window. You can have more than one clipping in the same water container.

It is recommended to swap out the water every day or two so you can continue to provide all possible nutrients to the clipping(s). Continue to swap out the water and watch your clippings slowly grow, but also look in the jar/container of water after a week or two. You should begin to see some roots beginning to grow at the base of the clipping. Your bine is growing and becoming an independent plant!!

Allow the root system to continue to grow. Once you see an abundance of roots that are greater than ~1”, you can move the clipping (or now new plant) from the jar/container and move to a small planter.

Hops ‘n’ Hounds first clippings
Raph and Jaesi’ growth, showing multiple clippings can successfully grow in the same container!

Provide the plant with good potting soil and water as it continues to grow in the planter. When you begin to see the clipping struggling to hold its own weight, an interim trellis can be created for it. We simply find a small diameter stick and place it in the soil next to the bine and “teach” the bine wrap around the stick. Another method is to stake down twine at the base and connect it to the top of a stick/pole. Use that instead of just a stick to train the plant to grow up along.

When to Plant on the Main Trellis

So far, we have waited until the new plant(s) are ~12” in length to move them to the main trellises. When you transfer plants to the main trellises, provide a nutrient rich surrounding of soil. From the interim trellis, you can simply unwrap the bine and wrap it around its new trellis line.

Usually for the first week or so, we will go out and make sure the bine is growing up the line properly and, if needed, we help it along. Hopefully, in a month or so, you have a new strong, healthy plant added to your garden! I say hopefully, as each step of this process has its opportunity for the clipping or plant to not take, but it’s been a good learning process so far. Don’t be discouraged if your first one doesn’t make it; Mine didn’t, but I learned from it! Keep going, stay positive, and get excited about future harvest to come! 

Setting Up Your Hops

This is Chris Schwall from Hops ‘n’ Hounds Farm writing what would be my first blog to try and get more information out there about growing your own hops that have worked for me. We will see how this goes as my wife, Alaina, is the more well read one of the family while I just “do,” so she will probably produce better blogs in the future.

Gifted Hops

I had mentioned to my friends who grow hops that I wanted to begin to grow a variety of and abundance of hops that I could easily get to for harvesting. So a lot of this information I am about to share is not self taught but advice and insight from my friends. Shout out to Raphael, Jaesi, Janette, and Allan who have been successfully growing their variety of hops. Both couples gifted hop plants when we moved to our new house, knowing my intentions. That’s my kind of house-warming gift! We were gifted with a Comet hop plant from Janette and Allan along with two Cascade hop plants from Raph and Jaesi! Thank you all!

Cascade Hop Plant before being planted at HnH
Comet Hop Plant weeks before coming to HnH

Initial Trellis Plan

I immediately was challenged with making trellises for these new hop plants in order to continue to allow them to grow healthy and establish their roots. I initially thought I could create a zig-zag wall of hops by allowing them to grow along a rope that I had jumping from two (2) six foot poles.

Hoping the hops would grow like a vine and make a natural fence, but that wasn’t the case… Research is important, along with experienced friends!

However, it was quickly advised to me to understand that hop plants move with the sun. This is why they simply wrap themselves around and grow upwards on rope or string, in most cases. Expecting them to grow at an angle or even sideways would require the gardner/farmer (me) to train the plant every day. “Training” is basically assisting the plant to continue to wrap around the string even though its motion following the sunrise and sunset does not mimic this. This turned me into researching how the “professionals” do it and how their trellises look. Before I continue on to the next part, I do want to mention that you can create beautiful and intricate trellises to grow your hops on. Some people have created natural gazebos with their hop plants, creating shade! However, I am planning to create an easy to harvest and maintain trellis system, so I changed my plans as my optimistic goal one day is to sell my hops to a brewery that might make a beer from them (after of course we make our own variety!).

Researching

After doing some research I found that the most common trellis system for hops are linear trellis systems in which wire is spanned between the top anchoring posts allowing rope/string to be hung vertically above the hop plant allowing it to grow along. Most research suggested allowing hop plants to grow 18’ or so, however, this is not necessary. You, as the farmer, can grow the hops to their maximum length or shorter.

**One major thing to note, Hops are an invasive species and roots can establish themselves up to 15’, so pick your planting area away from other plants and in an area that will allow for the plants to establish their roots without disrupting other items. Also, select an area where there is good water drainage through the soil. I am planting mine on the side of our driveway away from all other planters which also leads to the water runoff between our property and the neighbors.

Construction

So I decided on 12’ – 4” x 4” posts requiring me to bury and cement them, approximately 31-32” into the ground, giving my hop plants ~9.5’ to grow up to. I went to my local Home Depot and bought the following items:

  • (4) 12’ – 4”x4” (~$16 a piece)
  • (10) bags of concrete mix (~$5 per 80 lb bag)

              Note: Use the guide on the Quikrete bags to determine the number of bags you should purchase, which is based on depth of your posts.

  • (1) 1/8” x 30 ft (340 lb working load) Vinyl Coated Wire Rope Kit (w/ 2 thimbles and 6 clamps)

              Note: Working load was not my requirement but the kit had what I needed and was the only load it came in so I used it. Most likely over kill.

  • (6) 3/4” x 3” Screw eyes (130 lb working load)

              Note: This working load as a safety factor choice and I preffered the size of the eyes based on the wire rope I bought.

  • (1) 3/8” x 100’ Weather resistant rope.

              Note: The rope I bought had a working load of ~100 lbs. This is just the rating for the thickness of rope I wanted to get. I haven’t researched “best” rope thickness but the 3/8” looked decent and sturdy so I chose it.

Items not purchased: Ground Stakes. I didn’t purchase ground stakes because I already had some but any kind of ground stake will work just to anchor the rope near the plant so it knows what to attach to.

With all items in hand the final construction started. I researched guidelines for burying posts.

For the diameter of the hole it was recommended by most or all to be 3X your post dimension. So, for my 4”x4” post, the required hole diameter was 12.” For the post depth, the most common one I saw was 2’ + 10% of the length of post planning to bury. So with 12’ post the suggested depth to bury worked out to:

10% * 144” = 14.4”

2’ + 10% = 24”+14.4” = 38.8”

However, those recommendations are usually based on the post supporting fence or structures, which I am not doing, just simple hop plants bearing little load. With that said, I went with 2’ + 5% length of post. So with 12’ post the suggested depth to bury workout to:

5% * 144” = 7.2”

2’ + 5% = 24”+ 7.2” = 31.2”

Next, I wondered how far to separate the posts? There was no definite answer I could find with research, but did find that a suggested distance to have between your hop plants was about 2′ – 3’ apart. I chose to separate the posts 12’ apart allowing me to plant four hop plants about 2.5’ apart. So I dug my 12” diameter by ~32” depth holes, leveled out my posts, and cemented them in per Quikrete guidelines.

I allowed the Quikrete to dry and finished mounting the post by covering the dried cement with excess dirt. Once the post holes were fixed, I installed my 3/4” x 3” screw eyes toward the top of the posts on the inside of each section in order to secure the wire. Once the screws were in place, I ran my wire (taunt) between the screw eyes and secured them on each end using the supplied clamps. I did this for each section (so 4 posts gave me 3 sections).

Hops and hound, what more can we ask for?

Planting the Hops

Once the trellis was completed I started to plant my hops. I measured out the 2.5’ from the post and dug my hole. There are many recommendations on how to plant your hop plant, so follow whatever method you feel fits! I dug our hop plant holes ~16” in diameter and filled them with a mixture of fresh potting soil and the soil I dug up. We made sure to bury the plant so that the original base of the bine growing from the pot gifted to us was at the same place when buried in the ground. I hung our 3/8” rope from the wire secured to the top of the post (can simply tie it on) and staked bottom of the rope into the ground and slightly buried it under ground for stability. We had slight tension on the rope when hanging, and opted to decrease the tension we first had, to give a little more flexibility. We helped/trained the plant to wrap around the new rope at its new planted area by unwrapping it from its existing set up (bamboo pole or string they came with) and re-wrapped it, following its natural curvature, around the new rope on the trellis. That’s the part Alaina helped with!

Tons of growth!

We did this for all 3 plants gifted to us and since then we have done nothing but watch them grow!

Above is my first organization of the plants. After constructing all (3) sections I decided to quickly relocate the Comet hop bine to its own section, so I can have sections of: Cascade, Comet, and TBD between each set of posts!

I think my next post will be about the little bines we trimmed, then propagated to get more hop plants. Until then,

Chris

Here We Go!

We started a brand!

Hops ‘n’ Hounds was catalyzed by our move to a place we really want to settle into. When Chris and I moved in to our first home in Sellersville, PA, we had an idea that it was our starter home. It was an opportunity to build equity and give our dog a big yard to play in. It had everything we needed, but lacked a few things we wanted. Huge shout out to the neighbors there that welcomed us with open arms into their holiday parties and homes. They really shaped our lives in Pennsylvania. Beyond our neighbors, we really built a life in Pennsylvania while living in that house. Chris entrenched himself in his work, which happens to be his dream job with coworkers that have turned into wonderful friends. Alaina delved into enriching hobbies, got into MeetUp, and changed jobs.

On May 15th, we moved to a property in Center Valley, PA, which checked every ‘want’ box. Everyday we look at one another and express how happy we are to have this house and land. Chris had the idea to start an LLC, in case egg sales really took off or if we wanted the opportunity to grow the farm operation/outreach/patrons. I wasn’t sure at first, but really got on board once I had time to think it over. Chris also had the final idea for the name: combining our shared love of beer (although I am not into IPAs) and our coonhound, Juniper. One week later, in a flurry, I registered a website domain and LLC name. A couple days later we had a logo, website built, and social media profiles (Instagram and Facebook).

I can’t wait to see how HnH develops and grows!

|Alaina|